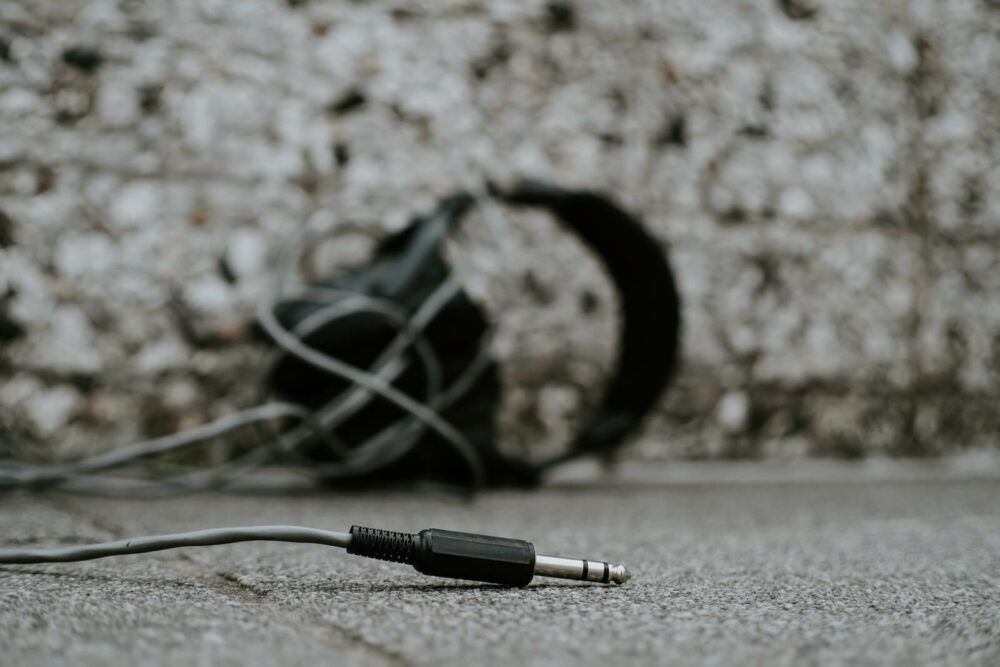
Do you have a pair of headphones that produce static noise? If so, don’t worry – you’re not alone. It can make it challenging to listen to music or watch videos. It can even be so loud that it’s sometimes impossible to hear anything else. But don’t worry! Static noise in headphones is a common problem and can usually be fixed easily. This article will discuss how to fix static noise in headphones and why it happens.
What is static noise in headphones?
Static noise is a continuous, low-level hissing sound that can be heard on top of the audio you’re trying to listen to. It’s usually caused by poor electrical connections or interference from other devices.
Sometimes you hear it when you turn on your headphones, and sometimes it starts after a while. Static noise can worsen if the device playing your audio is moved or shaken.
In TV or radio speakers, static noise is usually caused by a poor signal. In headphones there are many possible causes. We will discuss them below.
What causes static noise in headphones, and how to fix it?
Let’s look at some of the most common causes of static noise in headphones and how to fix them.
Faulty or loose wires
The wire from the headphone jack to the speaker can become loose over time. This can cause a poor connection and lead to interference and static noise. The wire could also become damaged, causing the same problem.
To fix this, remove the wire from your headphones and inspect it closely for any signs of damage or loose contact points. If you find a loose connection point, try tightening it. If there are any breaks in the wire itself (exposed wires), you will need to replace it.
Headphone jack issues
The headphone jack could be another source of static noise. This connector is responsible for transferring the audio signal from your device to your headphones, and if it’s not working correctly, you will hear static noise.
There are a few things that could go wrong with the headphone jack. The connector could be dirty or corroded, preventing a good connection. There are many ways to clean it properly without damaging your electronics.
The plug or jack itself might be damaged too, which would also cause a poor connection.
If you’re experiencing static noise in your headphones, try cleaning the headphone jack with a cotton swab and rubbing alcohol.
Damaged headphone speaker
The headphone speaker can also become damaged over time, which will cause a decrease in sound quality and static noise. This is usually caused by physical damage – such as being crushed or bent.
A headphone speaker might be damaged after years of heavy use or if dropped.
You will need to replace the damaged speaker with a new one that matches your headphones to fix this problem. But this isn’t possible with all headphones, so you might need to buy a new pair if you can’t fix your headphones.
Interference from wireless devices
Wireless devices such as Bluetooth speakers or cordless phones can cause static noise in headphones because they emit radio waves that interfere with other electronics nearby.
Other wireless devices such as routers, microwaves, and cordless phones can cause interference with the audio signal traveling to your headphones. If there are too many wireless devices near you, or if they’re not adequately shielded, you will hear static noise in your headphones.
There are two ways to fix this issue: change the channel on your device and keep it at least six feet away from where you’re using your headphone jack (or get rid of them altogether).
Modified audio settings (including equalizer)
If you’ve modified your audio settings, such as the equalizer or other advanced audio settings, it could be causing static noise in your headphones. This is usually because some settings are incompatible and can cause interference.
For example, if you boost the bass on your headphones, it could cause interference with the treble setting and create static noise.
To fix this issue, you need to go back to the default audio settings or adjust different settings until you find one that doesn’t produce any static noise.


Low-quality audio source
Sometimes the problem isn’t the headphones but the audio played through them. If you’re listening to low-quality audio files or the volume is too high, it can cause static noise in your headphones.
This often happens when listening to old Youtube videos since the audio quality is usually poor, and it can be hard to tell if there’s any static noise in your headphones.
Try downloading higher-quality audio files or increasing the volume gradually until you find a comfortable level to fix this issue. The easiest way to check if the audio quality is the problem is to listen to a song or podcast you’re familiar with.
Try multiple songs to verify that it’s not just one song causing the static noise.
Low-quality headphones
The quality of your headphones might be to blame if they’re not appropriately designed or made from cheap materials that can’t handle high volumes without creating static noise. If this is the case, replacing them with a better brand will fix your problem for good!
You should also look at other factors, such as how long you have used them. Did you buy them new or used? What kind of shape are they in now after all those years? It’s always worth investing in some decent equipment because it’ll last longer and sound better than something cheap – so don’t feel bad about spending money on these things occasionally!
Corrupted audio drivers on laptop/PC
Finally, if none of the above fixes work and you’re using a computer, it’s probably time to reinstall your audio drivers.
This mainly applies to Windows users but can also happen on Macs occasionally. If you’ve tried, all of the other fixes and your audio drivers are still corrupted. Hopefully, it’s worth reinstalling them to fix the static noise issue.
If you’re listening to music from your smartphone or any other device, try another pair of headphones to see if that solves the problem. Driver issues aren’t standard on mobile devices.
How to fix static in headphones – The bottom line
There you have it – a few ways to fix static noise in headphones. If one of these solutions doesn’t work for you, try another until you find the one that does! Remember, you’re not alone.
If you’re still experiencing this issue after trying these methods, it might be time to invest in a new pair of headphones or upgrade your audio equipment altogether. Static can be frustrating, but hopefully, one of these fixes will do the trick and improve your listening experience!
Make sure you try another pair of headphones before giving up hope. There’s always one pair out there that’ll work with your device without static noise issues at high volumes or after extended use.
Let us know if you have any questions about anything mentioned in this article. We’d love to hear from you!
How do I perform a factory reset on my Android device?
To perform a factory reset on your Android device, follow these thorough steps:
1. Before beginning the reset process, it’s essential to back up all important photos, videos, and files from your phone. This ensures that you won’t lose any valuable data.
2. Start by accessing the Settings on your Android device. You can typically find this app in your app drawer or by swiping down on the notification shade and tapping on the gear icon.
3. In the Settings menu, locate the section called General Management. Tap on it to proceed.
4. Within the General Management settings, you should find an option labeled “Reset.” Tap on this option to continue.
5. As a precautionary measure, double-check if all the relevant apps on your device are listed to be included in the reset process. It’s important to be aware of what will be erased during the factory reset.
6. Once you’ve reviewed the apps, click on the “Reset” button. This will start the factory reset process.
7. A confirmation message may appear, informing you that all data on your device will be erased. Confirm your decision to proceed with the factory reset.
8. Depending on the device and its settings, you may be prompted to enter your device’s password, PIN, or pattern lock to ensure the reset is authorized.
9. After confirming the reset, your Android device will begin to erase all data and restore itself to its original factory settings. This process may take a few minutes, and during this time, your device may restart multiple times.
10. Once the reset is complete, your device will boot up as if it were brand new, similar to when you first purchased it. You can then set it up and personalize it according to your preferences.
Remember, performing a factory reset will delete all data on your Android device, including apps, contacts, messages, and personal settings. Therefore, it’s crucial to back up any necessary files beforehand.
How do I switch from Wi-Fi to mobile data on my Android device?
To switch from Wi-Fi to mobile data on your Android device, follow these steps:
1. Open the Settings app on your Android device.
2. Scroll down and tap on “Connections” or “Network & internet”, depending on your device.
3. Look for and tap on “Wi-Fi” to access the Wi-Fi settings.
4. Toggle the switch next to Wi-Fi to turn it off.
5. Now, go back to the previous menu and tap on “Data usage” or “Mobile data”, depending on your device.
6. Toggle the switch next to Mobile data to turn it on.
7. You have successfully switched from Wi-Fi to mobile data on your Android device.
By following these steps, you can enjoy using your mobile data instead of Wi-Fi, which can be helpful if you experience issues like static noise while streaming videos online or if your Wi-Fi is overloaded.
How do I install the latest software updates on my Android device?
To install the latest software updates on your Android device and ensure optimal performance and avoid any static noises in your audio, follow these steps:
1. Open the Settings app on your Android device. You can usually find it in the app drawer or by swiping down from the top of the screen and tapping on the gear-shaped settings icon.
2. Scroll down and look for the “About Phone” or “About Device” option. It is typically located towards the end of the Settings menu.
3. Tap on “About Phone” or “About Device” to access the device information and settings.
4. Look for the “System Update” or “Software Update” option. This may vary depending on your device’s manufacturer or Android version. Tap on it to proceed.
5. Your device will now check for any available software updates. If an update is available, you will be prompted to download and install it. Make sure you are connected to a stable Wi-Fi network as software updates can be large in size.
6. Tap on “Download” or “Download and Install” to initiate the update process. The download progress will be displayed on the screen.
7. Once the update is downloaded, your device will automatically begin the installation. The installation process may take several minutes, during which your device may restart a few times. Ensure that your device is adequately charged or connected to a power source during this process to prevent any interruptions.
8. After the installation is complete, your device will reboot, and you’ll be running the latest software version.
Note: It’s important to regularly check for software updates on your Android device, as they often include bug fixes, security patches, and performance improvements. Keeping your device up to date ensures a better user experience and protects against potential vulnerabilities.
How do I turn off the Do Not Disturb feature on my iPhone?
To turn off the Do Not Disturb feature on your iPhone, follow these steps:
1. Open the Settings app on your iPhone.
2. Scroll down and tap on “Do Not Disturb” from the list of options.
3. On the next screen, you will see a toggle button next to “Do Not Disturb.” Simply press the toggle button to turn it off.
4. Once turned off, your iPhone will revert to its regular notification settings, allowing calls, messages, and other alerts to come through as usual.
How can I fix static noise on my iPhone?
To fix static noise on your iPhone, follow these steps:
1. Perform a Soft Reset: Start by turning your iPhone off and then back on again. This simple but effective solution can often resolve the issue.
2. Check for Debris (For iPhones With Headphone Jack): Examine the audio port of your iPhone for any dirt or debris. Inspect the headphone cable and audio jack for damage or breakage. Additionally, carefully inspect the headphone speakers or earbuds for any dirt or debris. Use a soft-bristled brush to gently clean each opening, ensuring that no debris remains. Once done, reconnect your headphones to the iPhone.
3. Disable the “Do Not Disturb” Feature: Sometimes, the “Do Not Disturb” feature can cause static noise. Make sure this feature is turned off to see if it resolves the issue.
4. Close Background Apps: Force close all running applications on your iPhone to eliminate any potential software conflicts that could be causing the static noise.
5. Reset Settings for Network and Audio: Go to the “Settings” app on your iPhone and choose “General.” From there, tap on “Reset” and select “Reset Network Settings” and “Reset All Settings” options, if available. This process can help in resolving any software-related issues causing the static noise.
6. Update iOS: Ensure that you have the latest iOS version installed on your iPhone. Apple often rolls out updates to fix bugs and enhance device performance, so updating your device may address the static noise problem.
7. Restore iPhone: If none of the above steps have resolved the issue, you can consider restoring your iPhone to its factory settings. However, please note that this process will erase all data, so it is essential to create a backup beforehand. You can restore your iPhone through iTunes or using the “Settings” app on your device.
Remember, if the static noise problem persists even after following these steps, it may indicate a hardware issue. In such cases, it is best to contact Apple Support or visit an authorized service center for further assistance.
How can I use the Windows Audio Troubleshooter to address headphone static noise issues?
To address headphone static noise issues, you can utilize the Windows Audio Troubleshooter tool provided by Windows. Follow these steps to use it:
1. Press the “Windows” key on your keyboard, followed by the “S” key. This will open the Windows search function.
2. Type “Settings” in the search bar and click on the “Open” option that appears in the search results. This will open the computer settings.
3. Within the settings window, navigate to the “Update & Security” section and click on it.
4. In the left-hand sidebar, locate and click on the “Troubleshoot” tab.
5. Scroll down and find the section titled “Get up and running”. Within this section, click on the “Playing Audio” option.
6. After selecting “Playing Audio”, click on the “Run the troubleshooter” button.
7. The troubleshooter will now start automatically detecting and addressing issues related to audio playback on your computer.
8. Follow the on-screen instructions provided by the troubleshooter to troubleshoot and resolve any headphone static noise problems detected.
By utilizing the Windows Audio Troubleshooter in this manner, you can effectively troubleshoot and address headphone static noise issues on your Windows computer.
How can I disable sound enhancements to eliminate crackling or buzzing sounds?
To eliminate crackling or buzzing sounds in your headphones, you can disable sound enhancements. Follow these steps to do so:
1. Press the Windows key + S to open the search bar.
2. Type “Control Panel” and click on the option to open it.
3. In the Control Panel window, navigate to the “Hardware and Sound” section.
4. Click on “Sound”.
5. In the “Playback” tab, locate the “Speakers” option and right-click on it.
6. Select “Properties” from the right-click menu.
7. A new window will appear. Go to the “Enhancements” tab.
8. Within the “System Effects Configuration” section, look for the option to “Disable all sound effects”.
9. Tick the checkbox next to “Disable all sound effects”.
10. Click on “Apply” to save the changes and then click “OK” to close the window.
Following these steps will disable all sound enhancements on your system, which should help eliminate crackling or buzzing sounds in your headphones.
How can I fix static noise on my headphones caused by corrupt or outdated drivers?
To fix static noise on your headphones caused by corrupt or outdated drivers, you can follow these steps:
1. Press the “Windows key + R” simultaneously to open the Run dialog box. Type “regedit” and press Enter to open the Windows registry editor. If prompted, click “Yes” to confirm.
2. Be cautious while making changes in the registry editor as improper editing can cause issues. It is recommended to create a backup of your registry before proceeding. To do this, go to the “File” menu, select “Export,” and save a copy of the registry to a safe location.
3. Within the registry editor, navigate to the following path:
Computer\HKEY_LOCAL_MACHINE\SYSTEM\CurrentControlSet\Control\Class\{36fc9e60-c465-11cf-8056-444553540000}
You can directly copy-paste this path into the navigation bar of the registry editor.
4. Locate the “CurrentControlSet” folder and click on it.
5. On the right side of the registry editor, search for a value named “UpperFilters”. Right-click on it and select “Delete”.
6. Close the registry editor and proceed to restart your computer.
7. After the restart, check if the static noise on your headphones persists. If it does, proceed to the next steps.
8. Press the “Windows key + S” to open the search bar. Type “Device Manager” and select the “Open” option to launch the Device Manager.
9. In the Device Manager, locate and expand the category “Universal Serial Bus controllers”.
10. Look for any items that are labeled as controllers and uninstall them. To uninstall, right-click on each item and select “Uninstall”. Repeat this process for all controller items within the category.
11. Once the uninstallation is complete, close the Device Manager and restart your computer again.
12. After the restart, check if the static noise issue on your headphones has been resolved.
By following these steps, you should be able to fix static noise caused by corrupt or outdated drivers on your headphones.
How can I fix headphone static noise issue on my PC?
To fix the issue of static noise in your headphones when using them with a Windows 10 computer, there are several methods and approaches you can consider. However, it is important to determine the specific cause of the problem before making any permanent changes to your PC. Here are some effective solutions:
1. Check and Update Audio Drivers: Corrupted or outdated audio drivers can often lead to static noise. To fix this, you can manually update the drivers from the manufacturer’s website or use a reliable driver updating tool to ensure you have the latest version.
2. Replace Faulty Hardware: If the static noise persists, the culprit might be your CPU fan or power supply. These components can sometimes generate electromagnetic interference that interferes with audio signals. Consider replacing them to see if it resolves the issue.
3. Adjust Audio Format: Changing the audio format can sometimes alleviate static noise problems. Right-click on the speaker icon in the taskbar, select “Open Sound settings,” then click on “Sound Control Panel.” Under the “Playback” tab, find your headphones, click on them, and select “Properties.” In the properties window, navigate to the “Advanced” tab and try different audio formats, such as 16 bit, 44100 Hz (CD Quality), or 24 bit, 48000 Hz (Studio Quality).
4. Disable Sound Enhancements: Windows offers various sound enhancement features that may cause static noise when enabled. To disable these enhancements, right-click on the speaker icon in the taskbar, select “Open Sound settings,” then click on “Sound Control Panel.” Under the “Playback” tab, find your headphones, click on them, and select “Properties.” Go to the “Enhancements” tab and check the box that says “Disable all sound effects.”
5. Use the Windows Audio Troubleshooter: Windows provides a built-in tool to troubleshoot audio-related problems. To access it, right-click on the speaker icon in the taskbar and select “Troubleshoot sound problems.” Follow the prompts and allow Windows to scan for and fix any issues it finds.
Remember, these solutions are not exhaustive, and the effectiveness might vary depending on the specific cause of the static noise issue. If none of these methods help, it may be worth contacting a professional or seeking further assistance.
How can I fix headphone static noise issue on my Mac?
To fix the static noise issue with your headphones on your Mac, you can try the following steps:
1. Start by connecting your headphones to your Mac computer.
2. Go to the System Preferences by clicking on the Apple menu at the top left corner of your screen and selecting “System Preferences”.
3. In the System Preferences window, locate and click on the “Sound” icon.
4. In the Sound settings, select the “Output” tab.
5. Double-check that your headphones are selected as the output device. If not, choose your headphones from the list of available options.
6. Once your headphones are selected, locate the “Sound Effects” tab.
7. Look for the option that says “Play feedback when volume is changed” and uncheck the tickbox next to it. Then, toggle the option on and off while checking your headphones to see if the static noise disappears.
8. If the above steps didn’t resolve the issue, there is another method you can try.
9. Open the “Applications” folder on your Mac and then go to the “Utilities” folder.
10. In the Utilities folder, find and open the “Audio MIDI Setup” application.
11. In the Audio MIDI Setup window, you will see a list of available devices on the left side of the screen.
12. Locate the option named “Built-in Output,” right-click on it, and select “Use this device for output”.
13. After performing these steps, check if the static noise issue with your headphones is resolved.
By following these steps, you should be able to fix the static noise problem and enjoy clear audio on your Mac headphones.