If you want to make your friends and family nights memorable, you should always mix things up by including karaoke into the schedule. Karaoke is a great way to break the ice at parties and can bring out some serious talent! If you want to make it easier for the singers to read the lyrics, you’ll need to know how to connect karaoke to a smart TV. If that’s what you’re trying to do, you’ve come to the right place! Keep reading for a brief guide that walks you through the different methods to connect your karaoke to smart TVs!
Key Takeaways:
- Connecting karaoke to a smart TV allows for a larger screen display of lyrics, enhancing the karaoke experience.
- There are two main methods to connect a karaoke machine to a smart TV: wired connections and wireless connections.
- Wired connections are the most popular and compatible method, utilizing AV and RCA cables.
- Wireless connections provide a cleaner and easier connection without the need for cables.
- If you don’t have a karaoke machine, you can still enjoy karaoke on your smart TV with alternative methods such as smartphone apps or YouTube karaoke versions.
How to Connect a Karaoke Machine to a Smart TV
Karaoke machines are the perfect way to enjoy singing your favorite songs. With their premium speakers, high-quality microphones, and built-in mixers, they offer an immersive karaoke experience. If you want to take your karaoke sessions to the next level by utilizing your smart TV’s larger screen to display and sing along with the lyrics, you’ll need to connect your karaoke machine to your smart TV. Fortunately, there are two main methods to achieve this: wired connections and wireless connections.
Using Wired Connections

Wired connections are the most popular and compatible way to connect a karaoke machine to a smart TV. Most karaoke machines use AV and RCA cables for connection. To set up your karaoke machine with your smart TV, follow these steps:
- Check your smart TV’s available connections. Look for ports labeled “AV” or “RCA” which are commonly used for audio and video inputs.
- Purchase the appropriate connection cable based on your TV’s available connections. Make sure to choose a cable that matches the ports on your karaoke machine as well.
- Connect one end of the cable to the corresponding ports on the karaoke machine and the other end to the AV or RCA ports on your smart TV.
- Once the cables are securely connected, turn on your karaoke machine and smart TV.
- Using your smart TV’s remote, navigate to the input/source selection menu.
- Select the input/source connected to the karaoke machine. This may be labeled as “AV”, “RCA”, or similar.
After following these steps, your smart TV should display the karaoke screen, allowing you and your friends to sing along to your favorite tunes with ease!
Benefits of Using Wired Connections
Using wired connections for your karaoke setup offers several advantages:
- Stable Connection: Wired connections provide a more stable and reliable connection compared to wireless options, ensuring uninterrupted karaoke sessions.
- Compatibility: Most karaoke machines and smart TVs come with AV and RCA ports, making them compatible with each other.
- Easy Setup: Connecting your karaoke machine to your smart TV using cables is straightforward and doesn’t require additional setup or configuration.
By opting for wired connections, you can enjoy karaoke on your smart TV without worrying about connectivity issues or signal interference.
Using Wireless Connections
When it comes to connecting your karaoke machine to a smart TV, wireless connections offer a hassle-free option that eliminates the need for cables. To make use of wireless connections, ensure that your karaoke machine supports Bluetooth, WiFi, or both.
To establish a wireless connection, follow these simple steps:
- Put your karaoke machine in pairing mode.
- Access the Bluetooth settings on your smart TV.
- Pair your karaoke machine with your smart TV.
Once the pairing process is complete, your smart TV will seamlessly display the lyrics for the songs played on your karaoke machine. This wireless setup provides a cleaner and clutter-free environment, allowing you and your friends to focus on your singing performance.
To better understand the wireless connection process, take a look at the following setup guide:
| Your Karaoke Machine | Your Smart TV |
|---|---|
| 1. Put your karaoke machine in pairing mode. | 1. Access the Bluetooth settings on your smart TV. |
| 2. Activate and select the appropriate wireless function (Bluetooth/WiFi). | 2. Scan for available devices and locate your karaoke machine. |
| 3. Wait for the karaoke machine to appear on your smart TV. | 3. Select your karaoke machine from the list of available devices. |
| 4. Connect/pair your karaoke machine with your smart TV. | 4. Confirm the pairing on both devices. |
| 5. Once connected, start playing your favorite songs on the karaoke machine. | 5. The smart TV will display the lyrics in sync with the music. |
With the wireless connection in place, you can enjoy a seamless karaoke experience, singing along to your favorite tunes while reading the lyrics displayed on your smart TV screen.
Alternative Methods to Use Your Smart TV for Karaoke without the Machine
If you don’t have a karaoke machine, don’t worry! You can still enjoy karaoke on your smart TV using alternative methods. Here are a couple of options:
1. Smartphone Apps with Screen Sharing
You can use popular smartphone apps like Smule, Yoke Karaoke, or KaraFun to bring karaoke to your smart TV. These apps provide a wide range of songs and allow you to sing along with the lyrics. To display the lyrics on your smart TV, simply use the screen sharing feature available on most smartphones. This way, you can enjoy the full karaoke experience on the big screen.
2. YouTube Karaoke Versions
Another option is to use the YouTube app directly on your smart TV. Search for your favorite karaoke versions of songs on YouTube. Many popular songs have karaoke versions available, often with lyrics displayed on the screen. Create a playlist with your favorite songs and let the karaoke party begin!
With these alternative methods, you can transform your smart TV into a karaoke system without the need for a dedicated karaoke machine.
Table: Comparison of Alternative Methods for Karaoke on Smart TVs
| Method | Pros | Cons |
|---|---|---|
| Smartphone Apps with Screen Sharing |
|
|
| YouTube Karaoke Versions |
|
|
How to Connect Karaoke Machine to Laptop or PC
Connecting a karaoke machine to a laptop or PC is a straightforward process that allows you to enjoy your favorite tunes on a bigger screen. There are two primary methods to connect your karaoke machine to a laptop or PC: using wireless connections or utilizing an AUX cable.
Using Wireless Connections:
If your karaoke machine and laptop or PC both support Bluetooth, you can establish a wireless connection between them. Follow these steps:
- Ensure that both your karaoke machine and laptop or PC have Bluetooth capabilities.
- Enable Bluetooth on your karaoke machine and put it in pairing mode.
- On your laptop or PC, go to the Bluetooth settings and scan for nearby devices.
- Select your karaoke machine from the available devices and pair them.
Once paired, you can start playing karaoke tracks on your machine, and the audio will be transmitted wirelessly to your laptop or PC.
Using an AUX Cable:
If your karaoke machine and laptop or PC do not have Bluetooth capabilities or you prefer a wired connection, you can use an AUX cable. Here’s how:
- Check if your karaoke machine has an AUX output port.
- Get an AUX cable with the appropriate connectors for both your karaoke machine and laptop or PC.
- Connect one end of the AUX cable to the AUX output port of your karaoke machine.
- Connect the other end of the AUX cable to the headphone jack of your laptop or PC.
Make sure to adjust the volume levels on both devices to ensure optimal sound quality.
By following these simple steps, you can easily connect your karaoke machine to a laptop or PC, expanding your options for entertainment and enjoyment.
How to Connect Karaoke Machine to Phone
Connecting a karaoke machine to a phone is a simple process that allows you to enjoy karaoke on your smartphone. There are two main methods for connecting your karaoke machine to your phone: Bluetooth and AUX cable.
Using Bluetooth Connection
To connect your karaoke machine to your phone via Bluetooth, follow these steps:
- Ensure that your karaoke machine is in discoverable mode. Refer to the user manual for instructions on how to enable discoverability.
- On your phone, navigate to the Bluetooth settings.
- Turn on Bluetooth if it is not already enabled.
- Scan for available Bluetooth devices.
- Select your karaoke machine from the list of available devices.
- Once connected, you can start playing your favorite karaoke tracks on your phone and the sound will be output through the karaoke machine’s speakers.
Using AUX Cable
If your karaoke machine does not have Bluetooth functionality, you can use an AUX cable to connect it to your phone. Here’s how:
- Get a compatible AUX cable that matches the connectors on your karaoke machine and phone.
- Plug one end of the AUX cable into the headphone jack of your phone.
- Plug the other end of the AUX cable into the corresponding audio input on your karaoke machine.
- Ensure that both devices are powered on.
- Start playing your karaoke tracks on your phone, and the audio will be transmitted to the karaoke machine for amplification.
Connecting your karaoke machine to your phone opens up a world of possibilities for karaoke enthusiasts. Enjoy the convenience of having your karaoke library on your phone and amplify the experience with your karaoke machine’s high-quality speakers.
How to Connect Karaoke Machine to Tablet

Connecting a karaoke machine to a tablet is a convenient way to enjoy singing karaoke on a portable device. Whether you want to practice your favorite songs on the go or have a karaoke session with friends, here’s what you need to do:
Using Bluetooth
If your karaoke machine and tablet both have Bluetooth capabilities, you can easily connect them wirelessly. Follow these steps:
- Turn on the Bluetooth function on your tablet and karaoke machine.
- Put your karaoke machine into pairing mode. Refer to the user manual for instructions on how to do this.
- On your tablet, go to the Bluetooth settings and scan for available devices.
- Select your karaoke machine from the list of available devices.
- Once connected, you can start playing your favorite karaoke tracks on the tablet, and the audio will be transmitted to the karaoke machine’s speakers.
Using an AUX Cable
If your tablet and karaoke machine have a 3.5mm headphone jack or an audio output port, you can connect them using an AUX cable. Here’s how:
- Insert one end of the AUX cable into the headphone jack or audio output port on your tablet.
- Insert the other end of the AUX cable into the corresponding input port on your karaoke machine.
- Make sure both devices are powered on and set to the correct audio input/output settings.
- Play your karaoke tracks on the tablet, and the audio will be heard through the karaoke machine’s speakers.
Before attempting to connect your karaoke machine and tablet, check the compatibility of both devices and ensure they have the necessary ports or Bluetooth capabilities. This will help ensure a seamless and enjoyable karaoke experience.
Connecting your karaoke machine to a tablet opens up a whole new world of karaoke entertainment. Whether you prefer the convenience of wireless Bluetooth connectivity or the simplicity of using an AUX cable, you can now enjoy singing your favorite songs on the go. So grab your tablet, connect it to your karaoke machine, and let the karaoke party begin!
Connections Explained
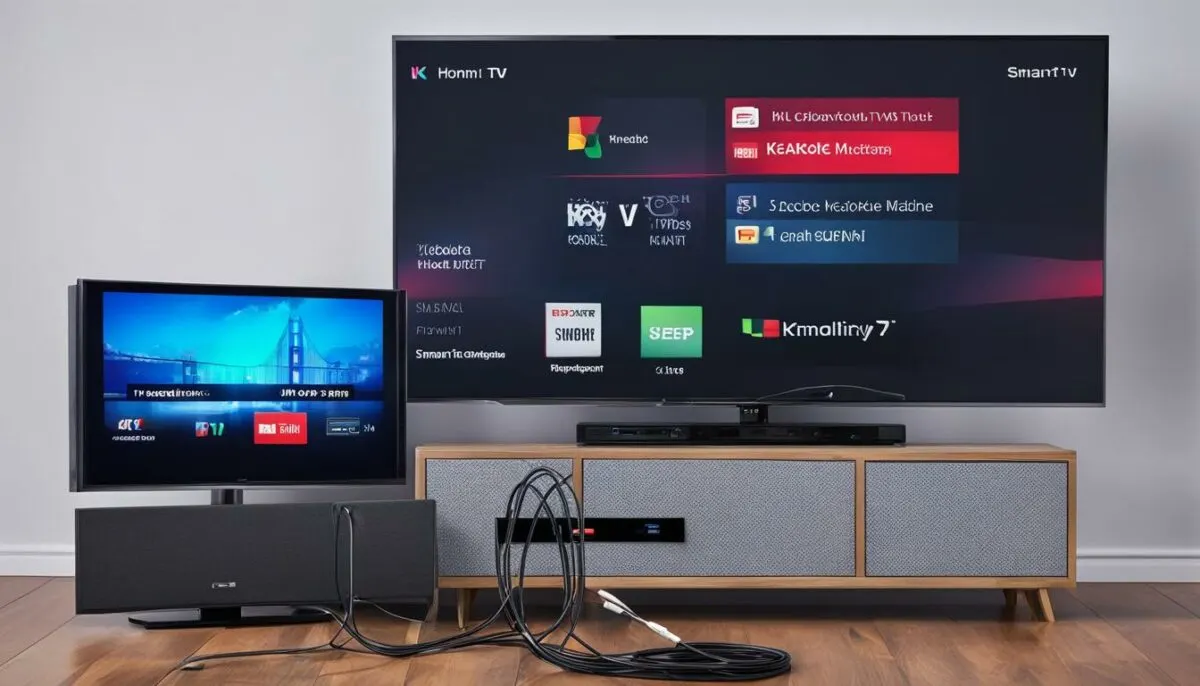
In order to connect your karaoke machine, smart devices, and TV effectively, it’s important to understand the various types of connections available. This section provides an overview of the most common connections used for these devices, including explanations and images of RCA cables and AUX cables.
When connecting your karaoke machine to a smart TV, you may need to use different cables depending on the available ports. The most commonly used cables are RCA and AUX. Let’s take a closer look at each:
RCA Cables
RCA cables, also known as AV cables, are color-coded for easy identification. They typically consist of three connectors: red (right audio channel), white (left audio channel), and yellow (video signal). These cables are widely used for connecting audio and video devices, such as DVD players, game consoles, and karaoke machines, to TVs. To connect your karaoke machine to a smart TV using RCA cables, follow these steps:
- Identify the RCA ports on your karaoke machine and the corresponding ports on your smart TV.
- Plug the red, white, and yellow connectors of the RCA cables into the matching ports on both devices.
- Ensure that the TV is set to the correct input source to display the karaoke screen.
AUX Cables
AUX cables, also known as audio cables or 3.5mm cables, are commonly used to connect audio devices. They have a standard 3.5mm audio jack on both ends, which can be plugged into the headphone jack of your karaoke machine and the audio input port of your smart TV. Here’s how to connect your karaoke machine to a smart TV using an AUX cable:
- Locate the headphone jack on your karaoke machine and the audio input port on your smart TV.
- Insert one end of the AUX cable into the headphone jack of the karaoke machine.
- Connect the other end of the AUX cable to the audio input port on the smart TV.
By understanding these connections and using the appropriate cables, you can easily connect your karaoke machine, smart devices, and TV to enjoy a fantastic karaoke experience on a larger screen.
| RCA Cables | AUX Cables |
|---|---|
| Used for audio and video connections | Used for audio connections |
| Consists of red, white, and yellow connectors | Has a 3.5mm audio jack on both ends |
| Color-coded for easy identification | No color coding |
| Connects to RCA ports | Connects to headphone jacks and audio input ports |
How to Connect TV and Laptop
If you want to enjoy a larger display of your karaoke videos, connecting your laptop to a TV is a great option. By using an HDMI cable, you can easily connect the two devices and enjoy your karaoke experience on a bigger screen. Follow the step-by-step instructions below to connect your laptop to a TV:
- Start by locating the HDMI ports on both your laptop and TV. The HDMI ports are usually labeled and can be found on the sides or back of the devices.
- Insert one end of the HDMI cable into the HDMI port on your laptop and the other end into the HDMI port on your TV.
- Once the cable is securely connected, turn on both the laptop and TV.
- Using your TV remote, select the appropriate HDMI input. This will vary depending on your TV model, but it is usually labeled as “HDMI 1,” “HDMI 2,” etc.
- On your laptop, navigate to the display settings. This can typically be accessed by right-clicking on the desktop and selecting “Display settings” or by going to the Control Panel or System Preferences and selecting the “Display” option.
- In the display settings, choose the option to extend or duplicate the display. Selecting “Extend” will allow you to use your laptop screen as well, while selecting “Duplicate” will mirror your laptop screen on the TV.
- Once you have selected the desired display settings, you should see your laptop screen on the TV. You can now play your karaoke videos and enjoy them on the larger screen.
Connecting your laptop to a TV using an HDMI cable is a straightforward process that can greatly enhance your karaoke experience. Whether you’re hosting a karaoke party or simply enjoying a solo singing session, the larger display will make it even more enjoyable. So go ahead, connect your laptop to a TV, and sing your heart out!
Conclusion
Connecting a karaoke machine to your smart TV is a breeze, and it can greatly enhance your karaoke experience. Whether you prefer wired or wireless connections, there are various methods available to suit your needs. By following the easy steps outlined in this guide, you’ll be able to seamlessly connect your karaoke machine to your smart TV and enjoy singing your favorite songs with lyrics displayed on the big screen.
With wired connections, such as using AV and RCA cables, you can make a reliable and compatible connection between your karaoke machine and smart TV. These cables are widely available and ensure a stable transfer of audio and video signals, allowing you to fully immerse yourself in the karaoke experience.
If you prefer a cable-free setup, wireless connections offer a convenient solution. By ensuring your karaoke machine supports Bluetooth or Wi-Fi, you can easily pair it with your smart TV. This eliminates the need for cables and provides a seamless connection for displaying the lyrics on the TV screen.
Whether you’re hosting a karaoke night at home or planning a fun gathering with friends and family, connecting your karaoke machine to your smart TV opens up a world of entertainment possibilities. Now you can sing your heart out and showcase your talent with ease, all while enjoying the immersive experience of a large screen karaoke setup.
FAQ
How can I connect a karaoke machine to a smart TV?
There are two main methods for connecting a karaoke machine to a smart TV: wired connections and wireless connections.
What are the wired connection options for connecting a karaoke machine to a smart TV?
The most popular and compatible wired connection options are using AV and RCA cables. Make sure to get the proper cable based on your TV’s available connections. Connect the cables to the corresponding ports on both the karaoke machine and the TV, and adjust the TV to the correct channel to display the karaoke screen.
How can I use wireless connections to connect a karaoke machine to a smart TV?
If your karaoke machine supports Bluetooth or WiFi, you can use wireless connections. Put your karaoke machine in pairing mode, then pair it with your smart TV through the TV’s Bluetooth settings. Once paired, the TV will display the lyrics for the songs played on the machine.
Can I enjoy karaoke on my smart TV without a karaoke machine?
Yes, you can still enjoy karaoke on your smart TV using alternative methods. One option is to use smartphone apps like Smule, Yoke Karaoke, or KaraFun, and use the screen sharing feature to display the lyrics on your smart TV. Another option is to use the YouTube app on your smart TV and search for karaoke versions of songs. You can create a playlist and play the songs directly on your TV.
How do I connect a karaoke machine to a laptop or PC?
Connecting a karaoke machine to a laptop or PC is similar to connecting it to a smart TV. You can use wireless connections like Bluetooth or use an AUX cable to connect the karaoke machine to the headphone jack of your laptop or PC. Check the compatibility and available connections on both devices before connecting.
Can I connect a karaoke machine to a phone?
Yes, connecting a karaoke machine to a phone is usually done through Bluetooth. Make sure your karaoke machine is discoverable, then pair it with your phone through the phone’s Bluetooth settings. Alternatively, you can use an AUX cable to connect the karaoke machine to the headphone jack of your phone.
How can I connect a karaoke machine to a tablet?
Connecting a karaoke machine to a tablet is similar to connecting it to a phone. You can use Bluetooth or an AUX cable to establish the connection. Check the compatibility and available connections on both devices.
What are the different connections used to connect karaoke machines, smart devices, and TVs?
The most common connections include AV and RCA cables for wired connections, Bluetooth and WiFi for wireless connections, and HDMI cables for connecting a laptop to a TV.
How do I connect a laptop to a TV to display karaoke videos?
To connect a laptop to a TV for a larger display of your karaoke videos, you can use an HDMI cable. Connect one end of the HDMI cable to the laptop’s HDMI port and the other end to the TV’s HDMI port. Adjust the TV’s input source to the corresponding HDMI port.
How to connect a TV and laptop together?
To connect a TV and laptop together, you can use an HDMI cable. Connect one end of the HDMI cable to the laptop’s HDMI port and the other end to the TV’s HDMI port. Adjust the TV’s input source to the corresponding HDMI port.