Printing on a MacBook can be a daunting task, especially if you’re unfamiliar with the process. That’s why we’ve put together a comprehensive guide to help you navigate the various aspects of printing on your MacBook. From setting up a printer to troubleshooting common printing issues, we’ve got you covered.
In this guide, we’ll cover everything you need to know about how to print on your MacBook, including:
- Setting up a printer on MacBook
- Troubleshooting printing issues on MacBook
- Adjusting print settings on MacBook
- Wireless printing on MacBook
- Printing on MacBook via USB connection
- Choosing the right printer for your MacBook
- Maximizing print quality on MacBook
- Print management apps for MacBook
- Print security on MacBook
Key Takeaways:
- Printing on a MacBook can seem daunting, but with the right guidance, it’s a simple and intuitive process.
- Setting up a printer is the first step to printing on a MacBook, and we’ll guide you through the process.
- If you encounter any issues while printing, we’ll help you troubleshoot common problems and find solutions.
- Adjusting print settings on your MacBook can help you optimize print quality and conserve resources.
- Wireless printing is a convenient option for MacBook users, and we’ll show you how to set it up.
By the end of this guide, you’ll have all the knowledge you need to print on your MacBook with ease and confidence.
Setting up a Printer on MacBook
Printing on your MacBook is a straightforward process, but you need to have your printer set up first. Whether it is a brand new printer or an old one, it needs to be connected to your MacBook before you can begin printing.
Connecting Your Printer to MacBook
Follow these simple steps to connect your printer to your MacBook:
- First, turn on your printer and make sure it is connected to a power source.
- Next, connect the printer to your MacBook using a USB cable. If your printer is wireless, you can connect it to your MacBook through Wi-Fi or Bluetooth.
- Once connected, click on the Apple menu and select System Preferences. Then, click on Printers and Scanners.
- Click the plus (+) button at the bottom of the printer list to add a new printer.
- Your MacBook will automatically detect the connected printer and display it in the list of available printers.
- Select your printer from the list and click Add. Your printer is now connected to your MacBook and ready to use.
If you encounter any issues during this process, refer to the printer’s user manual or contact the printer manufacturer for assistance.
Installing Printer Drivers
Before you can start using your printer, you need to install the necessary drivers on your MacBook. Most printers come with a CD that contains the drivers, but you can also download them from the printer manufacturer’s website. Follow these steps to install the printer drivers:
- Insert the CD that came with your printer into your MacBook and follow the instructions to install the drivers.
- If your printer did not come with a CD, visit the printer manufacturer’s website and search for the drivers for your specific printer model.
- Download and install the drivers following the instructions provided by the manufacturer.
- Restart your MacBook after the installation is complete.
Printing on MacBook Steps
Now that your printer is set up and drivers are installed, it’s time to start printing. Here are the steps to follow:
- Open the document or file you want to print.
- Click on File in the top-left corner of your screen and select Print.
- Choose your printer from the list of available printers.
- Adjust print settings if necessary, such as paper size, orientation, or print quality.
- Click Print to start printing. Your MacBook will send the print job to the printer, and the printer will start printing your document.
Congratulations, you have successfully set up your printer on your MacBook and printed your first document.
Troubleshooting Printing Issues on MacBook

Printing on your MacBook can be frustrating when things don’t go as planned. Here are some common printing issues you may encounter and how to troubleshoot them:
Printer Not Found
If your MacBook cannot find your printer, make sure the printer is plugged in and turned on. Ensure that the printer is connected to your Wi-Fi network and within range. If your printer is still not found, try restarting both your printer and your MacBook.
Print Jobs Stuck in Queue
If your print jobs are stuck in the queue and won’t print, head to the Printers & Scanners preferences on your MacBook. Select your printer and click on the “Open Print Queue” button. This will show you the currently queued jobs. You can then try deleting stuck jobs or resetting the printer to clear the queue.
Low Print Quality
If your printouts are coming out blurry or faded, check your ink or toner levels. If they are low, replace them. You can also adjust print quality settings in the Printers & Scanners preferences. Increase the print quality for sharper and clearer results.
Printer Offline
If your printer appears offline, check that it is connected to your Wi-Fi network and turned on. Make sure your MacBook is also connected to the same Wi-Fi network. You can also try restarting both your printer and MacBook to re-establish the connection.
By following these troubleshooting tips, we hope that you can resolve any issues that may arise during the printing process on your MacBook.
Adjusting Print Settings on MacBook
Printing documents on a MacBook is hassle-free, but knowing how to adjust print settings is crucial to optimizing your printouts. In this section, we will guide you through the process of customizing print settings on your MacBook and the various options available to you.
How to Adjust Print Settings on MacBook
1. Open the document you wish to print.
2. Click on “File” located in the top left-hand corner of the screen, and then select “Print” from the drop-down menu.
3. The print dialog box will open, displaying various print settings options.
4. Choose the printer you wish to use. If you have multiple printers set up, ensure the correct one is selected.
5. Select the number of copies you need.
6. Specify which pages you want to print. For instance, print all pages, specific pages, or a range of pages.
7. Choose the paper size that you want to use. If you’re using a non-standard paper size, click on “Manage Custom Sizes” to add a new paper size.
8. Select the orientation of the document. Choose between portrait or landscape mode.
9. Use the “Scale” option to adjust the print size. You can reduce or enlarge the size to make it fit the page or print at the original size.
10. Adjust the print quality settings. The higher the print quality selected, the better the output, but it can take longer to print.
11. Choose whether to print in color or black and white. Printing in grayscale or black and white can help save ink.
12. Click “Print” to start printing the document.
Common Print Settings on MacBook
Below are some of the common print settings on MacBook:
| Print Setting | Description |
|---|---|
| Paper Size | Choose the size of the paper you want to print on. The most common sizes are US Letter and A4. |
| Orientation | Choose between portrait or landscape mode. Portrait mode is suitable for text-heavy documents, while landscape mode is ideal for images and graphics. |
| Scale | Adjust the size of the document to fit the page, or print at its original size. |
| Print Quality | Choose between standard or high-quality settings. The higher the quality selected, the better the output, but it can take longer to print. |
| Color Options | Choose between printing in color or black and white. If you want to save ink, print in grayscale or black and white. |
By adjusting print settings on your MacBook, you can achieve better print quality and conserve ink and paper. Be sure to experiment with different settings to find the optimal configuration for your printing needs.
Wireless Printing on MacBook
If you’re looking for a convenient way to print from your MacBook, wireless printing is your answer. It allows you to print documents from your MacBook without the need for cables or external devices. Here’s how to set it up:
- Ensure that your MacBook and printer are connected to the same Wi-Fi network.
- Click on the Apple logo in the top-left corner of your MacBook screen and select “System Preferences.”
- Click on “Printers & Scanners.”
- Click the “+” button to add a new printer.
- Your MacBook will begin to search for available printers. Once your printer is found, it will appear on the list of devices. Click on it and select “Add.”
- Your printer is now set up for wireless printing on your MacBook.
It’s that simple! Now you can print documents, photos, and other files from your MacBook wirelessly. However, be sure to keep your printer and MacBook software up-to-date to avoid compatibility issues.
Benefits of Wireless Printing
Wireless printing offers a wide range of benefits, including:
- Convenience: Print from anywhere in the room without the need for cables.
- Flexibility: Easily switch between multiple devices without having to connect or disconnect cables.
- Efficiency: Save time and energy with seamless printing workflows.
- Cost-effectiveness: Eliminate the need for additional hardware or accessories.
Overall, wireless printing is a great option for anyone looking to simplify their printing process on their MacBook.
“Wireless printing offers the ultimate convenience, allowing you to print from anywhere in the room without the need for cables.”
Printing on MacBook via USB Connection
If you prefer a more stable connection for printing on your MacBook, connecting your printer via USB is a great option. Here’s a step-by-step guide on how to set up your printer with a USB cable:
- Ensure that your printer is switched off.
- Use a USB cable to connect your printer to your MacBook. The cable should fit into the USB port of your MacBook and the USB port on your printer.
- Once connected, switch on your printer and wait for your MacBook to recognize it.
- Click on the Apple Menu on your MacBook and go to System Preferences.
- Select Printers and Scanners.
- You should see your printer listed under the Printers section. Click on the printer and select the option to Add.
- Follow the on-screen instructions to complete the setup process.
- Once completed, your printer should be ready to print via USB connection.
Printing via USB connection is a reliable option, especially if you have a large volume of documents to print. It’s important to ensure that your printer and MacBook have the necessary drivers installed to avoid any compatibility issues.
Printing on MacBook via USB Connection
If you encounter any issues with printing via USB, check your USB cable and ports to ensure they are functioning correctly. If you continue to experience issues, you may need to troubleshoot your printer and MacBook settings or seek technical support.
Choosing the Right Printer for Your MacBook
Choosing the right printer for your MacBook can be a daunting task, but it doesn’t have to be. With so many options available on the market, it’s important to consider your specific needs and preferences to find the perfect fit for you.
Before you start your search, consider the type of printing you will be doing the most. Are you printing documents, photos, or both? Do you need a printer that can handle large volumes of paper or one that is compact and portable? These are just a few questions that can help you narrow down your options.
Factors to Consider When Choosing a Printer for Your MacBook
Once you have a clear idea of your printing needs, it’s time to consider other factors that will influence your decision:
- Compatibility: Make sure the printer you select is compatible with your MacBook. Check the printer’s technical specifications or contact the manufacturer to confirm compatibility.
- Connectivity: Decide whether you prefer a wired or wireless connection. If you want to connect wirelessly, make sure the printer has built-in Wi-Fi or Bluetooth capabilities.
- Features: Consider what features you need, such as automatic double-sided printing, scanning, copying, or faxing capabilities.
- Print quality: Look for a printer that produces high-quality prints, especially if you will be printing photos or other graphics.
- Price: Set a budget for your printer purchase and compare prices between models to find the best value for your money.
Top Printers for MacBook Users
Here are some top-rated printers that are compatible with MacBook and offer a range of features to suit different needs:
| Printer Model | Connectivity | Features | Price Range |
|---|---|---|---|
| HP OfficeJet Pro 9015e | Wi-Fi, Ethernet, USB | Automatic two-sided printing, scanning, copying, faxing, 6.75 cm touchscreen display | $229.99 – $329.99 |
| Epson EcoTank ET-2720 | Wi-Fi, USB | Cartridge-free printing, 1.44″ color display, automatic two-sided printing | $219.99 – $249.99 |
| Canon PIXMA TR150 | Wi-Fi, USB | Wireless printing, 1.44″ OLED display, mobile device printing, compact and portable design | $199.99 |
Remember, the right printer for you depends on your unique needs and preferences. Take the time to do your research and find a printer that will work seamlessly with your MacBook and meet all of your printing requirements.
Maximizing Print Quality on MacBook
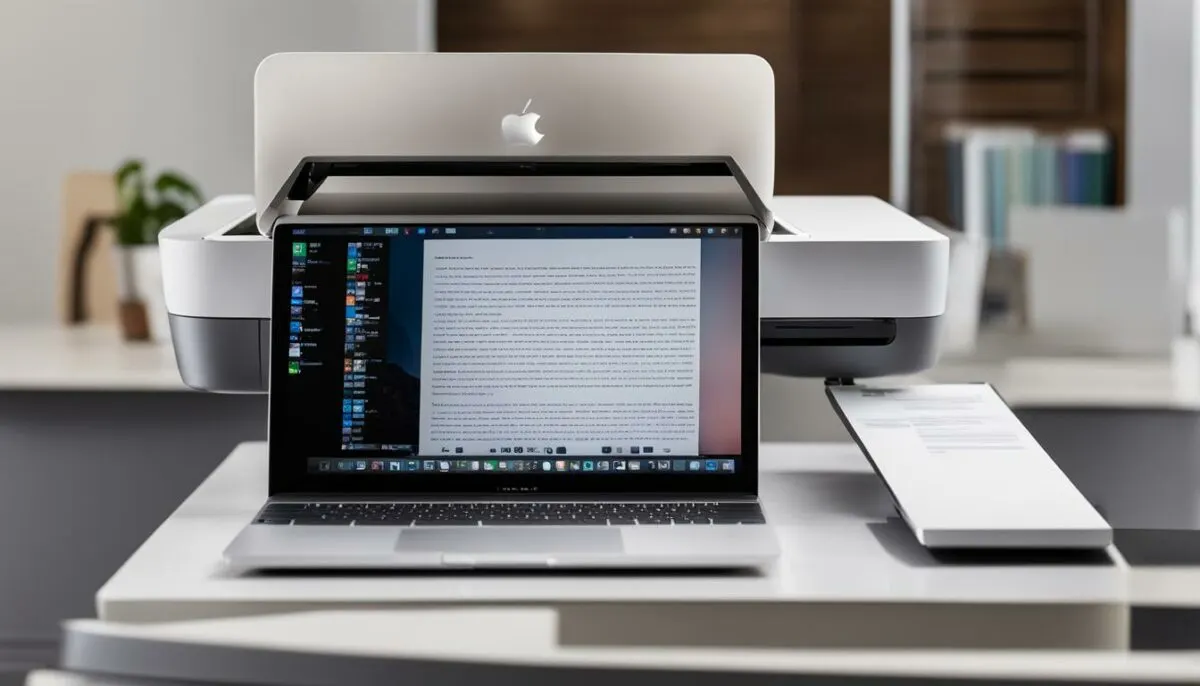
Printing documents and photos should produce high-quality outputs that meet your standards. If you’re not satisfied with the quality of your printouts on your MacBook, then this section is for you. Here, we will share some valuable tips and techniques to help you enhance the print quality of your MacBook.
Adjust Print Settings
The first step to enhancing the print quality of your MacBook is to adjust the print settings based on your needs. You can control the print quality, paper size, and other settings from the print dialog box. Here are some settings you can adjust for better print quality:
| Setting | What to adjust |
|---|---|
| Print quality | Select a higher print quality for more clarity and detail. |
| Paper type | Choose a paper type that suits your document or photo, such as glossy, matte, or textured paper. |
| Orientation | Ensure the orientation is set correctly so that the content appears in the desired orientation. |
Calibrate Your Printer
Calibrating your printer can help improve the color accuracy and overall print quality. You can do this through the printer settings or calibration software. Follow the instructions carefully to ensure accurate calibration.
Use High-Quality Paper
The type and quality of paper you use can have a significant impact on the print quality. Choose high-quality paper that is compatible with your printer for the best results.
Clean and Maintain Your Printer
Maintaining your printer is crucial to achieving optimal print quality. Regularly clean the printer heads, cartridges, and other components to remove any dirt or debris that can affect the quality of output. Refer to your printer manual for specific instructions on how to clean and maintain your printer.
By adjusting print settings, calibrating your printer, using high-quality paper, and maintaining your printer, you can maximize the print quality on your MacBook. Follow these tips and techniques to produce high-quality printouts that exceed your expectations.
Print Management Apps for MacBook

Printing on your MacBook can be made even easier with the help of print management apps. These apps provide additional functionalities and features that can streamline your printing workflow, saving you time and effort. Here are some of the best print management apps for MacBook:
| App Name | Description |
|---|---|
| Printopia | This app allows you to print to any printer connected to your Mac without the need for additional software. It also enables you to send documents to Dropbox, Evernote, or a specific folder on your Mac. |
| Printer Pro | Printer Pro turns your iPhone or iPad into a printing machine, allowing you to print documents, emails, web pages, and more from your device. It supports various printing options, including duplex printing, and enables you to preview your documents before printing. |
| Paprika Recipe Manager | This app is perfect for foodies who love to print recipes. It allows you to clip recipes from the web and print them in a clean, easy-to-read format. You can also create grocery lists from your recipes and access them on your iPhone or iPad. |
These are just a few examples of the many print management apps available for MacBook users. Depending on your specific needs, you can find an app that suits you and enhances your printing experience.
Print Security on MacBook

Printing on a MacBook offers convenience and versatility, but it also poses potential security risks. Sensitive or confidential information can easily be printed and fall into the wrong hands. To protect your data, it is essential to implement proper print security measures.
Here are some tips for maintaining print security:
- Secure printing: Some printers offer secure printing options, such as requiring a password to release the print job. This ensures that only authorized individuals can access the document.
- Encrypted communication: Ensure that your printer and MacBook communicate using encrypted communication methods, such as HTTPS or SSL, to prevent interception by hackers.
- Use a virtual print driver: A virtual print driver can create a secure PDF of the document, which can then be printed from a secure location. This prevents any unauthorized access to the printed document.
- Regularly update printer firmware: Manufacturers often release firmware updates that address known security vulnerabilities. Make sure to regularly update your printer’s firmware to ensure it is protected.
By implementing these measures, you can ensure that your printed documents and data remain secure when printing on a MacBook.
Conclusion
Congratulations! You have now learned how to effortlessly print on your MacBook. We hope this guide has been helpful in setting up your printer, troubleshooting any printing issues, adjusting print settings, and exploring various print management apps available for MacBook users. With this knowledge, you can now confidently handle any printing task on your MacBook.
Remember to choose the right printer for your specific needs, whether that be a wireless or USB connection, and enhance the output of your printed documents and photos by maximizing print quality. Don’t forget to also prioritize print security and protect sensitive information by implementing secure printing practices.
Overall, printing on your MacBook should no longer be a daunting task. With the help of this guide, you can easily navigate through printing tasks and make the most out of your printing preferences. So go ahead, print away to your heart’s content!
FAQ
How do I set up a printer on my MacBook?
To set up a printer on your MacBook, follow these steps:
1. Connect your printer to your MacBook using a USB cable or ensure both devices are connected to the same Wi-Fi network.
2. Open the “System Preferences” on your MacBook.
3. Click on “Printers & Scanners.”
4. Click on the “+” button to add a new printer.
5. Your MacBook will automatically search for available printers. Select your printer from the list.
6. Click on “Add” to add the printer to your MacBook.
Your printer is now set up and ready to use.
What should I do if I encounter printing issues on my MacBook?
If you experience printing problems on your MacBook, try these troubleshooting steps:
1. Check the printer’s connection to your MacBook and ensure it is properly connected.
2. Restart your MacBook and the printer.
3. Update your printer’s drivers. Visit the manufacturer’s website for the latest drivers compatible with your printer model.
4. Reset the printing system on your MacBook. Open “System Preferences,” click on “Printers & Scanners,” right-click on the printer, and select “Reset Printing System.”
If the issue persists, consult the printer’s user manual or contact the printer manufacturer for further assistance.
How can I adjust print settings on my MacBook?
To adjust print settings on your MacBook, follow these steps:
1. Open the document or image you want to print.
2. Click on “File” in the menu bar and select “Print.”
3. In the print dialog box, you can adjust settings such as paper size, orientation, print quality, and number of copies.
4. Once you have made the desired adjustments, click on “Print” to start the printing process.
How do I print wirelessly from my MacBook?
To print wirelessly from your MacBook, you need to set up your printer for wireless printing. Here’s how:
1. Connect your printer to the same Wi-Fi network as your MacBook.
2. Open the “System Preferences” on your MacBook.
3. Click on “Printers & Scanners.”
4. Click on the “+” button to add a new printer.
5. Select your printer from the list of available printers.
6. Click on “Add” to add the printer to your MacBook.
Once set up, you can select the wireless printer when printing documents or images.
Can I connect my printer to my MacBook using a USB cable?
Yes, you can connect your printer to your MacBook using a USB cable. Here’s how:
1. Connect one end of the USB cable to your printer and the other end to an available USB port on your MacBook.
2. Your MacBook should automatically detect the printer and install the necessary drivers.
3. Open the document or image you want to print.
4. Click on “File” in the menu bar and select “Print.”
5. Choose your connected USB printer from the list of available printers.
6. Click on “Print” to start printing via the USB connection.